


SkyMAk
SkyMAk.

Google's Android L: 'One of the most comprehensive releases we have done'
New features for smartphone and tablet software include enhanced notifications and 'material design'

Fin is a trendy gadget you can wear on the thumb and make your whole palm as a digital touch interface.
Fin presents a thumb ring that turns your hand into a universal motion-based input


Wednesday, June 12, 2013
Configuring OSPF Routing Protocol Step by step configuration
In this article I will demonstrate an example of OSPF Routing configuration. We will use four different series router so you can get familiar with all different platform covered in CCNA exam. Create a topology as shown in figure.

| 1841 Series Router0 (R1) | ||
| FastEthernet0/0 | Serial0/0/0 | |
| IP address | 10.0.0.1 | 20.0.0.1 |
| Connected With | Pc0 | R2 on Serial 0/0 |
| 2811 Series Router0 (R4) | ||
| FastEthernet0/0 | Serial0/0/0 | |
| IP address | 50.0.0.1 | 40.0.0.2 |
| Connected With | Pc1 | R3 on Serial 0/0 |
| 2621XM Series Router0 (R3) | ||
| FastEthernet0/0 | Serial0/0/0 | |
| IP address | 30.0.0.2 | 40.0.0.1 |
| Connected With | FastEthernet0/0 | R4 on Serial 0/0/0 |
| 2620XM Series Router1 (R2) | ||
| FastEthernet0/0 | Serial0/0 | |
| IP address | 30.0.0.1 | 20.0.0.2 |
| Connected With | R3 on FastEthernet0/0 | R1 on Serial 0/0/0 |
| PC-PT PC0 | ||
| FastEthernet0 | Default Gateway | |
| IP address | 10.0.0.2 | 10.0.0.1 |
| Connected With | R1 on FastEthernet0/0 | |
| PC-PT PC1 | ||
| FastEthernet0 | Default Gateway | |
| IP address | 50.0.0.2 | 50.0.0.1 |
| Connected With | R4 on FastEthernet0/0 | |
Configuring OSPF is slightly different from configuring RIP. When configuring OSPF, use the following syntax:
Router(config)# router ospf process_ID
Router(config-router)# network IP_address wildcard_mask area area_#
The process_ID is locally significant and is used to differentiate between OSPF processes running on the same router. Your router might be a boundary router between two OSPF autonomous systems, and to differentiate them on your router, you will give them unique process IDs. Note that these numbers do not need to match between different routers so they have nothing to do with autonomous system numbers.
To configure any router double click on it and select CLI.To configure this topology use this step by step guide.
(1841Router0) Hostname R1
To configure and enable ospf routing on R1 follow these commands exactly.
Router>enable
Router#configure terminal
Enter configuration commands, one per line.  End with CNTL/Z.
Router(config)#hostname R1
R1(config)#interface fastethernet 0/0
R1(config-if)#ip address 10.0.0.1 255.0.0.0
R1(config-if)#no shutdown
%LINK-5-CHANGED: Interface FastEthernet0/0, changed state to up
%LINEPROTO-5-UPDOWN: Line protocol on Interface FastEthernet0/0, changed state to up
R1(config-if)#exit
R1(config)#interface serial 0/0/0
R1(config-if)#ip address 20.0.0.1 255.0.0.0
R1(config-if)#clock rate 64000
R1(config-if)#bandwidth 64
R1(config-if)#no shutdown
%LINK-5-CHANGED: Interface Serial0/0/0, changed state to down
R1(config-if)#exit
%LINK-5-CHANGED: Interface Serial0/0/0, changed state to up
R1(config)#router ospf 1
R1(config-router)#network 10.0.0.0 0.255.255.255 area 0
R1(config-router)#network 20.0.0.0 0.255.255.255 area 0
R1(config-router)#exit
R1(config)#
(2620XM-Router1) Hostname R2
To configure and enable ospf routing on R2 follow these commands exactly.
Router>enable
Router#configure terminal
Enter configuration commands, one per line.  End with CNTL/Z.
Router(config)#hostname R2
R2(config)#interface serial 0/0
R2(config-if)#ip address 20.0.0.2 255.0.0.0
R2(config-if)#no shutdown
%LINK-5-CHANGED: Interface Serial0/0, changed state to up
%LINEPROTO-5-UPDOWN: Line protocol on Interface Serial0/0, changed state to up
R2(config-if)#exit
R2(config)#interface fastethernet 0/0
R2(config-if)#ip address 30.0.0.1 255.0.0.0
R2(config-if)#no shutdown
%LINK-5-CHANGED: Interface FastEthernet0/0, changed state to up
R2(config-if)#exit
%LINEPROTO-5-UPDOWN: Line protocol on Interface FastEthernet0/0, changed state to up
R2(config)#router ospf 2
R2(config-router)#network 20.0.0.0 0.255.255.255 area 0
R2(config-router)#network 3
00:03:10: %OSPF-5-ADJCHG: Process 2, Nbr 20.0.0.1 on Serial0/0 from
 LOADING to FULL, Loading Done0.0.0.0 0.255.255.255 area 0
R2(config-router)#network 30.0.0.0 0.255.255.255 area 0
R2(config-router)#exit
R2(config)#
(2620XM-Router2)Hostname R3
To configure and enable ospf routing on R3 follow these commands exactly.
Router>enable
Router#configure terminal
Enter configuration commands, one per line.  End with CNTL/Z.
Router(config)#hostname R3
R3(config)#interface fastethernet 0/0
R3(config-if)#ip address 30.0.0.2 255.0.0.0
R3(config-if)#no shutdown
%LINK-5-CHANGED: Interface FastEthernet0/0, changed state to up
%LINEPROTO-5-UPDOWN: Line protocol on Interface FastEthernet0/0, changed state to up
R3(config-if)#interface serial 0/0
R3(config-if)#ip address 40.0.0.1 255.0.0.0
R3(config-if)#clock rate 64000
R3(config-if)#bandwidth 64
R3(config-if)#no shutdown
%LINK-5-CHANGED: Interface Serial0/0, changed state to down
R3(config-if)#exit
%LINK-5-CHANGED: Interface Serial0/0, changed state to up
%LINEPROTO-5-UPDOWN: Line protocol on Interface Serial0/0, changed state to up
R3(config)#router ospf 3
R3(config-router)#network 40.0.0.0 0.255.255.255 area 0
R3(config-router)#network 30.0.0.0 0.255.255.255 area 0
00:04:53: %OSPF-5-ADJCHG: Process 3, Nbr 30.0.0.1 on FastEthernet0/0 from
 LOADING to FULL, Loading D
R3(config-router)#exit
R3(config)#
%SYS-5-CONFIG_I: Configured from console by console
R3#
(2811Router3) Hostname R4
To configure and enable ospf routing on R4 follow these commands exactly.
Router>enable
Router#configure terminal
Enter configuration commands, one per line.  End with CNTL/Z.
Router(config)#interface serial 0/0/0
Router(config-if)#ip address 40.0.0.2 255.0.0.0
Router(config-if)#no shutdown
%LINK-5-CHANGED: Interface Serial0/0/0, changed state to up
%LINEPROTO-5-UPDOWN: Line protocol on Interface Serial0/0/0, changed state to up
Router(config-if)#exit
Router(config)#interface fastethernet 0/0
Router(config-if)#ip address 50.0.0.1 255.0.0.0
Router(config-if)#no shutdown
%LINK-5-CHANGED: Interface FastEthernet0/0, changed state to up
%LINEPROTO-5-UPDOWN: Line protocol on Interface FastEthernet0/0, changed state to up
Router(config-if)#exit
R4(config)#router ospf 4
R4(config-router)#network 50.0.0.0 0.255.255.255 area 0
R4(config-router)#network 40.0.0.0 0.255.255.255 area 0
R4(config-router)#
00:06:32: %OSPF-5-ADJCHG: Process 4, Nbr 40.0.0.1 on Serial0/0/0 from
LOADING to FULL, Loading Done
R4(config-router)#exit
R4(config)#
PC-1
PC>ipconfig

IP Address......................: 10.0.0.2
Subnet Mask.....................: 255.0.0.0
Default Gateway.................: 10.0.0.1

PC>ping 50.0.0.2

Pinging 50.0.0.2 with 32 bytes of data:

Reply from 50.0.0.2: bytes=32 time=156ms TTL=124
Reply from 50.0.0.2: bytes=32 time=127ms TTL=124
Reply from 50.0.0.2: bytes=32 time=156ms TTL=124
Reply from 50.0.0.2: bytes=32 time=140ms TTL=124

Ping statistics for 50.0.0.2:
    Packets: Sent = 4, Received = 4, Lost = 0 (0% loss),
Approximate round trip times in milli-seconds:
    Minimum = 127ms, Maximum = 156ms, Average = 144ms
PC>
PC-2
PC>ipconfig

IP Address......................: 50.0.0.2
Subnet Mask.....................: 255.0.0.0
Default Gateway.................: 50.0.0.1

PC>ping 10.0.0.2

Pinging 10.0.0.2 with 32 bytes of data:

Reply from 10.0.0.2: bytes=32 time=140ms TTL=124
Reply from 10.0.0.2: bytes=32 time=141ms TTL=124
Reply from 10.0.0.2: bytes=32 time=157ms TTL=124
Reply from 10.0.0.2: bytes=32 time=156ms TTL=124

Ping statistics for 10.0.0.2:
    Packets: Sent = 4, Received = 4, Lost = 0 (0% loss),
Approximate round trip times in milli-seconds:
    Minimum = 140ms, Maximum = 157ms, Average = 148ms
You can verify that ospf is running successfully via show ip protocols command in privilege mode.
R4#show ip protocols

Routing Protocol is "ospf 4"
  Outgoing update filter list for all interfaces is not set
  Incoming update filter list for all interfaces is not set
  Router ID 50.0.0.1
  Number of areas in this router is 1. 1 normal 0 stub 0 nssa
  Maximum path: 4
  Routing for Networks:
    50.0.0.0 0.255.255.255 area 0
    40.0.0.0 0.255.255.255 area 0
  Routing Information Sources:
    Gateway         Distance      Last Update
    40.0.0.1             110      00:01:26
  Distance: (default is 110)

R4#
You can use show ip route command to troubleshoot ospf network. If you did not see information about any route checks the router attached with that network.
R4#show ip route
Codes: C - connected, S - static, I - IGRP, R - RIP, M - mobile, B - BGP
       D - EIGRP, EX - EIGRP external, O - OSPF, IA - OSPF inter area
       N1 - OSPF NSSA external type 1, N2 - OSPF NSSA external type 2
       E1 - OSPF external type 1, E2 - OSPF external type 2, E - EGP
       i - IS-IS, L1 - IS-IS level-1, L2 - IS-IS level-2, ia - IS-IS inter area
       * - candidate default, U - per-user static route, o - ODR
       P - periodic downloaded static route

Gateway of last resort is not set

O    10.0.0.0/8 [110/1564] via 40.0.0.1, 00:02:37, Serial0/0/0
O    20.0.0.0/8 [110/1563] via 40.0.0.1, 00:02:37, Serial0/0/0
O    30.0.0.0/8 [110/782] via 40.0.0.1, 00:02:37, Serial0/0/0
C    40.0.0.0/8 is directly connected, Serial0/0/0
C    50.0.0.0/8 is directly connected, FastEthernet0/0
R4#
To test ospf routing do ping from pc1 to pc2 and vice versa. If you get replay then you have successfully configured ospf routing but if you did not get replay double check this configuration and try to troubleshoot. I have uploaded a configured and tested topology in case you are unable to locate the problem spot then download this configuration file. And try to find out where have you committed mistake
Configuration command of OSPF
| Commands | Descriptions |
Router(config)#router ospf 1
|
Starts OSPF process 1. The process ID is any positive integer value between 1 and 65,535.
|
Router(config-router)#network 172.16.0.0 0.0.255.255 area 0
|
OSPF advertises interfaces, not networks. Uses the wildcard mask to determine which interfaces to advertise.
|
Router(config-if)#ip ospf hellointerval timer 20
|
Changes the Hello Interval timer to 20 seconds.
|
Router(config-if)#ip ospf deadinterval 80
|
Changes the Dead Interval timer to 80 seconds.
|
NOTE: Hello and Dead Interval timers must match for routers to become neighbors
| |
Router#show ip protocol
|
Displays parameters for all protocols running on the router
|
Router#show ip route
|
Displays a complete IP routing table
|
Router#show ip ospf
|
Displays basic information about OSPF routing processes
|
Router#show ip ospf interface
|
Displays OSPF info as it relates to all interfaces
|
Router#show ip ospf interface fastethernet 0/0
|
Displays OSPF information for interface fastethernet 0/0
|
Router#show ip ospf border-routers
|
Displays border and boundary router information
|
Router#show ip ospf neighbor
|
Lists all OSPF neighbors and their states
|
Router#show ip ospf neighbor detail
|
Displays a detailed list of neighbors
|
Router#clear ip route *
|
Clears entire routing table, forcing it to rebuild
|
Router#clear ip route a.b.c.d
|
Clears specific route to network a.b.c.d
|
Router#clear ip opsf counters
|
Resets OSPF counters
|
Router#clear ip ospf process
|
Resets entire OSPF process, forcing OSPF to re-create neighbors, database, and routing table
|
Router#debug ip ospf events
|
Displays all OSPF events
|
Router#debug ip ospf adjacency
|
Displays various OSPF states and DR/ BDR election between adjacent routers
|
Router#debug ip ospf packets
|
Displays OPSF packets
|

Wednesday, May 22, 2013
How to Setup IP camera
First to know
This tutorial about installing an ip camera covers almost all of our ip
cameras,so you can use this tutorial to install any ip camera bought
from our website.
Three connection ways:
Begin to setup
|


Newer Post Older Post

Wednesday, May 1, 2013

Monday, April 29, 2013

Wednesday, March 20, 2013
Finding Ip Address of a computer using CMD

In this tutorial i will teach you to find Ip Address of any website using Command Prompt or in short CMD. Using IP Address you can find location of the website server and do more stuff. I will demostrate this tutorial with Google but you can use this method to find IP Address of any website like twitter, facebook etc. So lets get started.
How to find IP ?
1. Go to Start > Type CMD and press Enter.2. Now write Ping followed by website URL whose IP you want to find.


In my next post i will show you another easy way to find website IP Address and teach you to use this IP to find its location.
Blocking Facebook On Your Computer
Blocking Facebook On Your Computer

In this tutorial i will teach you to specifically block facebook on your computer. This might be helpfull if you want to prevent students from using facebook in school and colleges or your employees in office. If you are parent and don't want you child to use facebook or any other particular site then follow simple steps given below. So lets get started.
How To Block Facebook ?
1. Go to Start > Programmes > Accesories2. Then Right click on Notepad and Run it as administrator.
3. Now open host file by clicking on File > Open and locate to following address
C:\WINDOWS\system32\drivers\etc
4. Then just below # 127.0.0.1 localhost paste folowing code
# Blocking Facebook
127.0.0.1 login.facebook.com
127.0.0.1 www.facebook.com
127.0.0.1 apps.facebook.com
127.0.0.1 blog.facebook.com
5. Now save the host file and done.
6. Open any browser and try to open facebook. It won't open. If facebook opens then you might have done somthing wrong. (let me know if you face any problem)
Monday, March 18, 2013
Free avast antivirus with crack till 2038
Avast Antivirus 8.0.1483 With Serial Key 2013
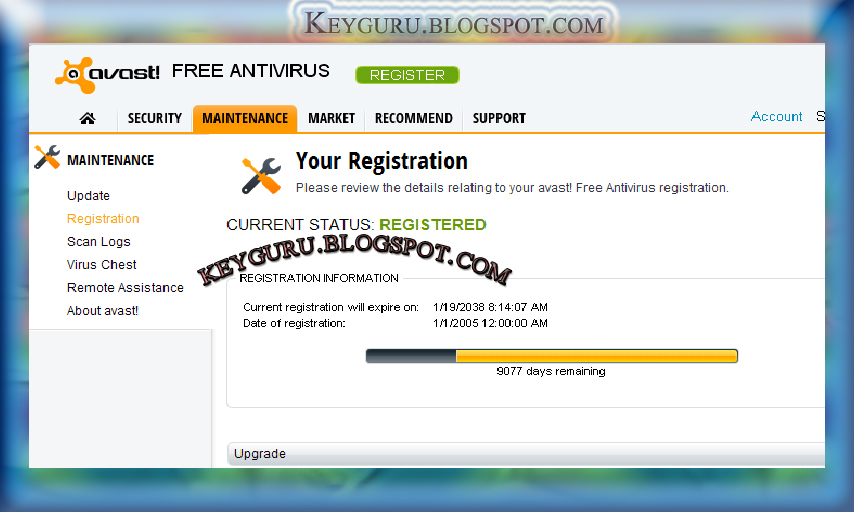
Avast 8 is a Free Antivirus with more than 150 millions users is one of the most popular and great anti-virus programs in the World today! Avast Home version is totally free for personal and non-commercial use, and is build with many useful latest features. Avast 8 Free Antivirus is wonderful for people who send emails and surf popular webs. But if you store up sensitive data on your computer so shop or use bank online without any hesitation.
Avast New Technology Features:
Streaming and real time virus database updates
Now you get every virus signature sent to you in realtime via link to the AVAST Virus Lab, rather than needing to wait for a usual database update. Your database will be always updated with latest definitions.
Files reputation system Features
FileRep lets you know whether a file is secure before you can open it – resolute in part by how several people have the file and how new the file is. The Avast technology is also used inside, to help the scanning engine make more bright decision.
AVAST Management Portal System
Your webbased AVAST Account portal is your own directory for all your avast Related data. It’s also allows you to track all of your avast installations, total with their health data, status data, and useful information. And it is multiplatform, allowing you to deal with avast installations on both Mac and Windows computers as like Android.
Remote Assistance Tool
The fresh Remote Assistance tool lets you start remote support from every ‘geek’ with your friends or family who agree to help. Initiate by you, it route through AVAST’s servers, bypasses firewalls, and can be finished by you at some time. You will never have to ask for help over the phone again.
Customizable installation
Your avast software can now can also be installed in Compatibility Mode, meaning that it will run entirely along with your other security software to work as a 2d line of defense. And even if you install avast 8 in normal mode, you are agreed the possibility to install the works you really need.
Password: WWW.KEYGURU.BLOGSPOT.COM
File Information
File Name:Avast antivirus plus Activation Key
File Size: 106.52 MB
File Type: Zip
Home page:www.avast.com
Requirements:Windows 2000 / XP / Vista / Windows 7 / XP64 / Vista64 / Windows 7 64 / Windows 8 /
Windows 8 64
thanks and courtesy http://www.keyguru.blogspot.in
Friday, March 15, 2013
Fake Access Point with Airsnarf
Hello Guys
This is a tutorial of How you can make a Fake access point by using airsnarf in Backtrack.
As you know wireless hotspots are everywhere. A mobile user can obtain connectivity quickly and easily in a wide variety of public locations. Some of these hotspots are free and some of them require a fee or subscription. Either way, you will continue to see how being in a public Wi-Fi hotspot poses the greatest security risk you will find.
Stealing Wi-Fi Hotspot Subscription Credentials
A big issue a few years back had to do with dial-related fraud in Russia. Basically, usernames and passwords to dial accounts were being bought and sold on the black market and the owners of the stolen credentials were being hit with enormous usage charges. In actuality, this still takes place. With the onset of Public Wi-Fi locations, the threat of fraud and misuse has also moved to the stealing of wireless subscription credentials.
An easy and inexpensive method to steal wireless subscription credentials is by Access Point Phishing. As it stands today, the only real methods a typical end-user has to determine if a wireless access point is valid is by recognizing the SSID (name of the wireless network) and ascertaining if the site has the look and feel of the real public Wi-Fi hotspot login page. Unfortunately for the end-user, both of these can be easily spoofed. Here’s how it’s done and no, you won’t have to carry a wireless access point around to do this.
Performing this technique requires two steps:
- Setting up your computer to look like an actual Access Point broadcasting the appropriate SSID
- Having the walled-garden, or login page that your computer will display look like the real login page of the provider whose signal you are broadcasting
It’s not hard to make your computer broadcast the SSID of your choice, in an attempt to get a person to connect to you instead of a valid Wi-Fi hotspot SSID. The problem with the ‘easy way’ is that the potential victim sees that this is an Ad-Hoc network and most people these days know not to connect to these. So, we employ the use of Airsnarf by the Schmoo Group to make this signal look like it’s coming from an Access Point. Essentially, we will be turning the laptop into an Access Point.
The most difficult part of using Airsnarf and other HostAP (Host Access Point) reliant programs is finding a card that supports the HostAP drivers. Airsnarf consists of a number of configurable files that control how it operates.
Where to get Airsnarf
BackTrack (BT) is a live CD based on Slax, hence Slackware, it is evolved from the widely adopted Whax and Auditor security distributions.
Slackware is one of the many Linux distribution, Slax is a linux live-distro version based on Slackware. BackTrack is a Penetration Testing oriented live-distro based on Slax.
BT has an intuitive layout, some tools are available in the menu and invoke automated scripts, most of the analysis tools are located either in the path or in the /pentest directory. It is possible to explore wireless tools under /pentest/wireless.
Airsnarf is located at /pentest/wireless/airsnarf-0.2
Using Airsnarf
airsnarf.cfg file used to configure basic Airsnarf functionality

dhcpd.src file can used to configure the DCHP settings of the access point created.

With Airnsnarf configured with default design settings, it will display a default login page that looks like the following. To make this attack really work, this login page needs to be modified to look just like a real Wi-Fi hotspot provider’s login. Depending upon your HTML skills, you can either get real fancy or just stick to basics.

Once Airsnarf is configured and the customer Login page is created, the attack can be launched. Any airport, coffee shop, or other public area where people utilize their laptops will work. To launch the attack, activate Airsnarf by typing the ./airsnarfcommand. Below is an example of what you’ll see when the attack is launched.

Airsnarf being launched and waiting for a connection
An end-user attempting to connect to the hotspot will see the SSID that was entered into the airsnarf.cfg file and use their computer to connect to that network. Upon launching their browser, they will be prompted to enter their username and password.

Windows Zero Config showing the KYRION HotSpot being broadcast by Airsnarf

Once the user enters their credentials and hits the Login button, their credentials have been compromised and can be used by the person with ill-intent. This could be only the beginning, though. Commonly, users will utilize the same username and password for many different accounts/websites. Consequently, the username and password that were just grabbed may enable a hacker to access the user’s e-mail, online banking, etc.
This login page will take the username and password that is entered and will dump them into a file where it can be read.
Example of credentials entered into Airsnarf AP Phishing Site and dumped to a file
Preventing Attack
There are basically two things to combating the previous hacks:
- Taking measures to ensure a hotspot is valid
- Protecting the machine against browser-based exploits
Subscribe to:
Posts (Atom)


0 comments:
Post a Comment