Search This Blog

Total Pageviews

SkyMAk

SkyMAk.

'simple ignorance'

Google's Android L: 'One of the most comprehensive releases we have done'

New features for smartphone and tablet software include enhanced notifications and 'material design'

Fin is a trendy gadget you can wear on the thumb and make your whole palm as a digital touch interface.

Fin presents a thumb ring that turns your hand into a universal motion-based input

Monday, December 31, 2012

How can I prevent users from writing to USB removable disks (USB flash drives)?


How can I prevent users from writing to USB removable disks (USB flash drives)?


USB removable disks (also known as flash drives or "Disk on Key" and other variations) are quickly becoming an integral part of our electronic life, and now nearly everybody owns one device or another, in forms of small disks, external hard drives that come enclosed in cases, card readers, cameras, mobile phones, portable media players and more.
Portable USB flash drives are indeed very handy, but they can also be used to upload malicious code to your computer (either deliberately or by accident), or to copy confidential information from your computer and take it away.
Microsoft has introduced some changes into Windows XP Service Pack 2 that allow an administrator some control over how USB Removable Disks (or flash drives) are handled. A new storage device policy named WriteProtect makes it possible to prevent all removable USB drives from being written to. Users can still read from these devices, but are not longer able to write to them.
This tweak will only work in Windows XP SP2 and above.

Block writing to USB Removable Disks

To block your computer's ability to use USB Removable Disks follow these steps:
  1. Open Registry Editor.
  2. In Registry Editor, navigate to the following registry key:
HKEY_LOCAL_MACHINE\SYSTEM\CurrentControlSet\Control\StorageDevicePolicies
  1. Create the following value (DWORD):
WriteProtect
and give it a value of 1.
Note: As always, before making changes to your registry you should always make sure you have a valid backup. In cases where you're supposed to delete or modify keys or values from the registry it is possible to first export that key or value(s) to a .REG file before performing the changes.
  1. Close Registry Editor. You do not need to reboot the computer for changes to apply.
Users trying to write to any USB Removable Disk will now get an Access Denied message.

Enable writing to USB Removable Disks

To return to the default configuration and enable your computer's ability to use USB Removable Disks follow these steps:
  1. Go to the registry path found above.
  1. Locate the following value:
WriteProtect
and give it a value of 0.
You can download a .REG file that configure this setting right HERE (1kb).

Further Reading

You may find these related articles of interest to you:

How do I delete an “undeletable” file?


How do I delete an “undeletable” file?


Method #1 - Kill explorer.exe

Do successfully delete an undeletable file that is caught be the explorer.exe process (and most of them are) do the following:
  1. Open a Command Prompt window and leave it open.
  2. Close all open programs.
  3. You now need to close EXPLORER.EXE. The proper way to shutdown Explorer is to raise the "Shut Down Windows" dialog (select "Shut Down..." from the start menu), hold down CTRL+SHIFT+ALT and press the CANCEL button. Explorer will exit cleanly.
Note: The <CTRL+SHIFT+ALT> at the 'Shut Down Windows' dialog method of closing Explorer is built into Explorer. (It was specifically designed so that developers writing Shell Extensions could get Explorer to release their Shell Extension DLLs while debugging them).
  1. Go back to the Command Prompt window and change to the directory where the undeletable file is located in. At the command prompt type DEL <filename> where <filename> is the file you wish to delete.
  2. Go back to Task Manager, click File, New Task and enter EXPLORER.EXE to restart the GUI shell.
  3. Close Task Manager.
(Tip modification submitted by James R. Twine who has a great utility called Delete FXP Filesthat can help you delete files and folders that simply won't go away).

Method #2 - Unlocker

Another cool tool that will allow you to delete any undeletable file is Unlocker (author's web site can be found HERE).

After installing the tool you will get a new context menu option when right-clicking any file in Windows Explorer.
If the folder or file is locked, a window listing of lockers will appear:
Simply click Unlock All and you are done!


How can I change the System partition drive letter in Windows XP?


How can I change the System partition drive letter in Windows XP?


For the most part, this is not recommended, especially if the drive letter is the same as when Windows was installed. The only time that you may want to do this is when the drive letters get changed without any user intervention. This may happen when you break a mirror volume or there is a drive configuration change. This should be a rare occurrence and you should change the drive letters back to match the initial installation.
To change or swap drive letters on volumes that cannot otherwise be changed using the Disk Management snap-in, use the following steps:
Note: In these steps, drive D refers to the (wrong) drive letter assigned to a volume, and drive C refers to the (new) drive letter you want to change to, or to assign to the volume.
  1. Make a full system backup of the computer and system state.
  2. Log on as an Administrator.
  3. Start Regedt32.exe (or Regedit.exe in Windows XP).
  4. Go to the following registry key:
HKEY_LOCAL_MACHINE\SYSTEM\MountedDevices
  1. Click MountedDevices.
  2. On the Security menu, click Permissions.
  3. Check to make sure Administrators have full control. Change this back when you are finished with these steps.
  4. Quit Regedt32.exe, and then start Regedit.exe.
  5. Go to the following registry key:
HKEY_LOCAL_MACHINE\SYSTEM\MountedDevices
  1. Find the drive letter you want to change to (new). Look for "\DosDevices\C:".
  2. Right-click \DosDevices\C:, and then click Rename. In Windows 2000 you must use Regedit instead of Regedt32 to rename this registry key.
  3. Rename it to an unused drive letter "\DosDevices\Z:". (This will free up drive letter C: to be used later.)
  4. Find the drive letter you want changed. Look for "\DosDevices\D:".
  5. Right-click \DosDevices\D:, and then click Rename.
  6. Rename it to the appropriate (new) drive letter "\DosDevices\C:".
  7. Click the value for \DosDevices\Z:, click Rename, and then name it back to "\DosDevices\D:".
  8. Quit Regedit, and then start Regedt32 (not required in Windows XP).
  9. Change the permissions back to the previous setting for Administrators (this should probably be Read Only).
  10. Restart the computer.

Links

Excel Password Recovery Instructions (.xls)


Excel Password Recovery Instructions (.xls)


Often when an employee departs, they take important Excel passwords with them. This guide outlines how to use a simple Excel password recovery application to crack lost or forgotten passwords, allowing you to unlock password-encrypted Microsoft Excel documents quickly as possible.

Step 1: Download and Install the Office Password Recovery Utility

To perform the following recovery steps, you'll need to grab the download of Office Password Recovery Pro, available directly here. (2.1Mb)
(Please note: The full version of this software requires the purchase of a 5-use license
Excel Password Recovery 1
The Open button launches the Recovery Wizard.
The Wizard gives you the option of simply decrypting the spreadsheet (aka. removing the password protection entirely) or displaying the original document password:
Excel Password Recovery 2

Recovery Option 1: 100% Instant Document Decryption

This option is the quickest way to access your file, but strips all password protection from the document, so you'll need to setup password protection on the file again if you want to lock it down in the future.
With this option, the application securely pings the Password Solutions' server to determine the type of encryption used on the file and determines the best decryption method for removing the password from the Excel workbook:
Excel Password Recovery 3
When prompted, choose where you’d like to save the unlocked, decrypted version and hit OK.
Success! The program now offers to automatically open your unlocked document.
Excel Password Recovery 4

Recovery Option 2: 'Recover the Password to Open'

If the document is password-protected and you’d like to recover the original password (perhaps for use in opening other Office documents) select Recover the Password to Open.
You’ll then be asked a couple questions to aid in determining the password schema. These are geared at narrowing the applications search for possible matches, but are not required.
If you don’t have any idea, simply leave all default selections, press the Next button twice and then click Finish.
Office Password Recovery then starts attempting to crack the password using a number of built-in 'attack schemes' and millions of unique password combinations.
Excel Password Recovery 5
Once your password has been recovered, the program clearly notifies you of the results:
Excel Password Recovery 6
Note: Even the passwords on individual sheets within your Excel workbook are recovered, giving you complete access across the entire workbook.
Excel Password Recovery 7
If you’re stuck and just can’t find that password, we highly recommend downloading Office Password Recovery Pro and running through these steps.

How can I disable the User Account Control (UAC) feature on my Windows Vista computer?


How can I disable the User Account Control (UAC) feature on my Windows Vista computer?


Windows Vista has the built-in ability to automatically reduce the potential of security breaches in the system. It does that by automatically enabling a feature called User Account Control (or UAC for short). The UAC forces users that are part of the local administrators group to run like they were regular users with no administrative privileges.
Running Windows 7? Also see our article on disabling UAC for Windows 7.
Although UAC clearly improves the security on Windows Vista, under some scenarios you might want to disable it, for example when giving demos in front of an audience (demos that are not security related, for example). Some home users might be tempted to disable UAC because of the additional mouse clicking it brings into their system, however I urge them not to immediately do so, and try to get used to it instead.
Anyway, if required, you can disable UAC by using one of the following methods:

Method #1 - Using MSCONFIG

  1. Launch MSCONFIG by from the Run menu.
  2. Click on the Tools tab. Scroll down till you find "Disable UAC" . Click on that line.
    MSCONFIG - Disable Account Protection
  3. Press the Launch button.
  4. A CMD window will open. When the command is done, you can close the window.
  5. Close MSCONFIG. You need to reboot the computer for changes to apply.
You can re-enable UAC by selecting the "Enable UAC" line and then clicking on the Launch button.
*Recommended: Speed up Vista boot times by reducing the number of programs that load at startup. Control your Vista startup list with this Vista app

Method #2 - Using Regedit

  1. Open Registry Editor.
  2. In Registry Editor, navigate to the following registry key:
    HKEY_LOCAL_MACHINE\Software\Microsoft\Windows\CurrentVersion\Policies\System
  3. Locate the following value (DWORD): EnableLUA and give it a value of 0.
    Regedit - Disable UAC
  4. Note: As always, before making changes to your registry you should always make sure you have a valid backup. In cases where you're supposed to delete or modify keys or values from the registry it is possible to first export that key or value(s) to a .REG file before performing the changes.
  5. Close Registry Editor. You need to reboot the computer for changes to apply.
In order to re-enable UAC just change the above value to 1.

Method #3 - Using Group Policy

This can be done via Local Group Policy or via Active Directory-based GPO, which is much more suited for large networks where one would like to disable UAC for many computers at once.
If using Local Group Policy you'll need to open the Group Policy Editor (Start > Run > gpedit.msc) from your Vista computer.
If using in AD-based GPO, open Group Policy Management Console (Start > Run > gpmc.msc) from a Vista computer that is a member of the domain. In the GPMC window, browse to the required GPO that is linked to the OU or domain where the Vista computers are located, then edit it.
  1. In the Group Policy Editor window, browse to Computer Configuration > Windows Settings > Security Settings > Local Policies > Security Options.
    Group Policy - Disable UAC
  2. In the right pane scroll to find the User Access Control policies (they're down at the bottom of the window). You need to configure the following policies:Group Policy - Disable UAC
  3. You'll need to reboot your computers.

Method #4 - Using Control Panel

  1. Open Control Panel.
  2. Under User Account and Family settings click on the "Add or remove user account".
    Add or remove user account
  3. Click on one of the user accounts, for example you can use the Guest account.
  4. Under the user account click on the "Go to the main User Account page" link.
    Go to the Main User Accounts Page
  5. Under "Make changes to your user account" click on the "Change security settings" link.
    Change security settings
  6. In the "Turn on User Account Control (UAC) to make your computer more secure" click to unselect the "Use User Account Control (UAC) to help protect your computer". Click on the Ok button.
    Turn on AUC
  7. You will be prompted to reboot your computer. Do so when ready.
    Disable UAC - Reboot
In order to re-enable UAC just select the above checkbox and reboot.
Related Vista Note: Some users have asked if we can help with a missing DirectX dll files in Windows Vista required to play some games.  You can download the

what is V LAN


What is a VLAN? How to Setup a VLAN on a Cisco Switch
Have you ever wondered what a Virtual LAN (or VLAN) is or been unclear as to why you would want one? If so, I have been in your place at one time too. Since then, I have learned a lot about what a VLAN is and how it can help me. In this article, I will share that knowledge with you.

What is a LAN?

Okay, most of you already know what a LAN is but let’s give it a definition to make sure. We have to do this because, if you don’t know what a LAN is, you can’t understand what a VLAN is.
A LAN is a local area network and is defined as all devices in the same broadcast domain. If you remember, routers stop broadcasts, switches just forward them.

What is a VLAN?

As I said, a VLAN is a virtual LAN. In technical terms, a VLAN is a broadcast domain created by switches. Normally, it is a router creating that broadcast domain. With VLAN’s, a switch can create the broadcast domain.
This works by, you, the administrator, putting some switch ports in a VLAN other than 1, the default VLAN. All ports in a single VLAN are in a single broadcast domain.
Because switches can talk to each other, some ports on switch A can be in VLAN 10 and other ports on switch B can be in VLAN 10. Broadcasts between these devices will not be seen on any other port in any other VLAN, other than 10. However, these devices can all communicate because they are on the same VLAN. Without additional configuration, they would not be able to communicate with any other devices, not in their VLAN.

Are VLANs required?

It is important to point out that you don’t have to configure a VLAN until your network gets so large and has so much traffic that you need one. Many times, people are simply using VLAN’s because the network they are working on was already using them.
Another important fact is that, on a Cisco switch, VLAN’s are enabled by default and ALL devices are already in a VLAN. The VLAN that all devices are already in is VLAN 1. So, by default, you can just use all the ports on a switch and all devices will be able to talk to one another.

When do I need a VLAN?

You need to consider using VLAN’s in any of the following situations:
  • You have more than 200 devices on your LAN
  • You have a lot of broadcast traffic on your LAN
  • Groups of users need more security or are being slowed down by too many broadcasts?
  • Groups of users need to be on the same broadcast domain because they are running the same applications. An example would be a company that has VoIP phones. The users using the phone could be on a different VLAN, not with the regular users.
  • Or, just to make a single switch into multiple virtual switches.

Why not just subnet my network?

A common question is why not just subnet the network instead of using VLAN’s? Each VLAN should be in its own subnet. The benefit that a VLAN provides over a subnetted network is that devices in different physical locations, not going back to the same router, can be on the same network. The limitation of subnetting a network with a router is that all devices on that subnet must be connected to the same switch and that switch must be connected to a port on the router.

How can devices on different VLAN’s communicate?

Devices on different VLAN’s can communicate with a router or a Layer 3 switch. As each VLAN is its own subnet, a router or Layer 3 switch must be used to route between the subnets.

What is a trunk port?

When there is a link between two switches or a router and a switch that carries the traffic of more than one VLAN, that port is a trunk port.
A trunk port must run a special trunking protocol. The protocol used would be Cisco’s proprietary Inter-switch link (ISL) or the IEEE standard 802.1q.

How do I create a VLAN?

Configuring VLAN’s can vary even between different models of Cisco switches. Your goals, no matter what the commands are, is to:
  • Create the new VLAN’s
  • Put each port in the proper VLAN
Let’s say we wanted to create VLAN’s 5 and 10. We want to put ports 2 & 3 in VLAN 5 (Marketing) and ports 4 and 5 in VLAN 10 (Human Resources). On a Cisco 2950 switch, here is how you would do it:
At this point, only ports 2 and 3 should be able to communicate with each other and ports 4 & 5 should be able to communicate. That is because each of these is in its own VLAN. For the device on port 2 to communicate with the device on port 4, you would have to configure a trunk port to a router so that it can strip off the VLAN information, route the packet, and add back the VLAN information.

What do VLAN’s offer?

VLAN’s offer higher performance for medium and large LAN’s because they limit broadcasts. As the amount of traffic and the number of devices grow, so does the number of broadcast packets. By using VLAN’s you are containing broadcasts.
VLAN’s also provide security because you are essentially putting one group of devices, in one VLAN, on their own network.

Article Summary

Here is what we have learned:
  • A VLAN is a broadcast domain formed by switches
  • Administrators must create the VLAN’s then assign what port goes in what VLAN, manually.
  • VLAN’s provide better performance for medium and large LAN’s.
  • All devices, by default, are in VLAN 1.
  • A trunk port is a special port that runs ISL or 802.1q so that it can carry traffic from more than one VLAN.
  • For devices in different VLAN’s to communicate, you must use a router or Layer 3 switch.
  • Even if you've worked on Cisco networks for a while, be sure to check out TrainSignal'sCCNA training

Friday, December 28, 2012

downloading step of windows 2008


downloading step of windows 2008

OSI reference model layer


The standard model for networking protocols and distributed applications is the International Standard Organization's Open System Interconnect (ISO/OSI) model. It defines seven network layers.
Short for Open System Interconnection, an ISO standard for worldwide communications that defines a networking framework for implementing protocols in seven layers. Control is passed from one layer to the next, starting at the application layer in one station, proceeding to the bottom layer, over the channel to the next station and back up the hierarchy.
At one time, most vendors agreed to support OSI in one form or another, but OSI was too loosely defined and proprietary standards were too entrenched. Except for the OSI-compliant X.400 and X.500 e-mail and directory standards, which are widely used, what was once thought to become the universal communications standard now serves as the teaching model for all other protocols.
Control is passed from one layer to the next, starting at the application layer in one station, proceeding to the bottom layer, over the channel to the next station and back up the hierarchy.
(This graphic is taken from The Abdus Salam International Centre for Theoretical Physics).
Understanding how the OSI Model works is not only useful for taking certification exams, but also for real life scenarios. Read How to use the OSI Model to Troubleshoot Networks for more info.

Layer 1 - Physical

Physical layer defines the cable or physical medium itself, e.g., thinnet, thicknet, unshielded twisted pairs (UTP). All media are functionally equivalent. The main difference is in convenience and cost of installation and maintenance. Converters from one media to another operate at this level.

Layer 2 - Data Link

Data Link layer defines the format of data on the network. A network data frame, aka packet, includes checksum, source and destination address, and data. The largest packet that can be sent through a data link layer defines the Maximum Transmission Unit (MTU). The data link layer handles the physical and logical connections to the packet's destination, using a network interface. A host connected to an Ethernet would have an Ethernet interface to handle connections to the outside world, and a loopback interface to send packets to itself.
Ethernet addresses a host using a unique, 48-bit address called its Ethernet address or Media Access Control (MAC) address. MAC addresses are usually represented as six colon-separated pairs of hex digits, e.g., 8:0:20:11:ac:85. This number is unique and is associated with a particular Ethernet device. Hosts with multiple network interfaces should use the same MAC address on each. The data link layer's protocol-specific header specifies the MAC address of the packet's source and destination. When a packet is sent to all hosts (broadcast), a special MAC address (ff:ff:ff:ff:ff:ff) is used.

Layer 3 - Network

NFS uses Internetwork Protocol (IP) as its network layer interface. IP is responsible for routing, directing datagrams from one network to another. The network layer may have to break large datagrams, larger than MTU, into smaller packets and host receiving the packet will have to reassemble the fragmented datagram. The Internetwork Protocol identifies each host with a 32-bit IP address. IP addresses are written as four dot-separated decimal numbers between 0 and 255, e.g., 129.79.16.40. The leading 1-3 bytes of the IP identify the network and the remaining bytes identifies the host on that network. The network portion of the IP is assigned by InterNIC Registration Services, under the contract to the National Science Foundation, and the host portion of the IP is assigned by the local network administrators. For large sites, the first two bytes represents the network portion of the IP, and the third and fourth bytes identify the subnet and host respectively.
Even though IP packets are addressed using IP addresses, hardware addresses must be used to actually transport data from one host to another. The Address Resolution Protocol (ARP) is used to map the IP address to it hardware address.

Layer 4 - Transport

Transport layer subdivides user-buffer into network-buffer sized datagrams and enforces desired transmission control. Two transport protocols, Transmission Control Protocol (TCP) and User Datagram Protocol (UDP), sits at the transport layer. Reliability and speed are the primary difference between these two protocols. TCP establishes connections between two hosts on the network through 'sockets' which are determined by the IP address and port number. TCP keeps track of the packet delivery order and the packets that must be resent. Maintaining this information for each connection makes TCP a stateful protocol. UDP on the other hand provides a low overhead transmission service, but with less error checking. NFS is built on top of UDP because of its speed and statelessness. Statelessness simplifies the crash recovery.

Layer 5 - Session

The session protocol defines the format of the data sent over the connections. The NFS uses the Remote Procedure Call (RPC) for its session protocol. RPC may be built on either TCP or UDP. Login sessions uses TCP whereas NFS and broadcast use UDP.

Layer 6 - Presentation

External Data Representation (XDR) sits at the presentation level. It converts local representation of data to its canonical form and vice versa. The canonical uses a standard byte ordering and structure packing convention, independent of the host.

Layer 7 - Application

Provides network services to the end-users. Mail, ftp, telnet, DNS, NIS, NFS are examples of network applications.

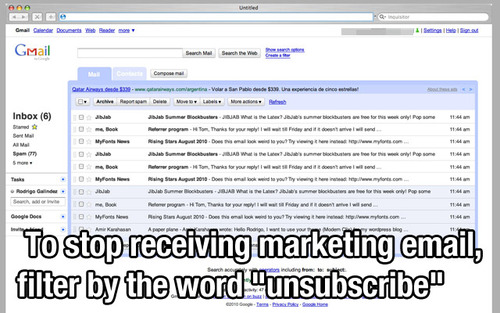
how stop marketing email...


Microsoft natural keyboard shortcuts


Microsoft natural keyboard shortcuts


Windows Logo (Display or hide the Start menu)


Windows Logo+BREAK (Display the System Properties dialog box)


Windows Logo+D (Display the desktop)


Windows Logo+M (Minimize all of the windows)

Windows Logo+SHIFT+M (Restore the minimized windows)


Windows Logo+E (Open My Computer)


Windows Logo+F (Search for a file or a folder)


CTRL+Windows Logo+F (Search for computers)


Windows Logo+F1 (Display Windows Help)


Windows Logo+ L (Lock the keyboard)


Windows Logo+R (Open the Run dialog box)


Windows Logo+U (Open Utility Manager)


how to recover a deleted item with software link


You have accidentally deleted important files from your hard disk permanently ? Most people think believe that the file is gone and it cannot be recovered. But that is wrong. You can still recover those files.

Recover My Files 3.98 is a file recovery software that can recover deleted files even if removed from the Recycle Bin.
It can be used to:
  • Recover formatted hard drives, even if you have reinstalled Windows!!!
  • Recover your files after a hard disk crash.
  • Get back files after a partitioning error.
  • Recover deleted documents, photos, videos, music and emails.
  • Recover from hard drive, camera card, USB, Zip, floppy disk or other media.

link for a recovery software download

check the working of a antivirus


If you want to check your anti-virus activity or effectiveness, you can use this notepad trick.
1. Copy this code:
X5O!P%@AP[4\PZX54(P^)7CC)7}$EICAR-STANDARD-ANTIVIRUS-TEST-FILE!$H+H*
2. Open Notepad and paste it.
3. Save it with .exe extension like checkantivirus.exe.
4. Your antivirus will detect this file and attempt to delete it as soon as you save this file.
5. That proves your antivirus is working properly, if not, try another reliable antivirus.

google drive steps

Font Size
Gmail is really famous among users of all the email clients available on the web and that is not because it has a cool interface rather it is famous for its reliability and huge space which includes storage space of 6000 megabytes  and increasing. Google doesn’t stop here and recently Google announced that users can now buy more online storage for Google services just by paying a little amount. So why not use this online storage space and use it externally probably as a network drive or one of your own computer hard drives.
Use Google Storage Space as Google Drive
I am going to show different methods by which your can use your Gmail account space as your external hard drive that too free. You will be able to download (or should I say copy) attachments from your Gmail account to your computer just as you would do from a drive on your computer. You can also use this space to upload content direct from your computer and save it online in your Gmail account.
1. GMAIL DRIVE
Gmail Drive Guide free
GMail Drive is a Shell Namespace Extension that creates a virtual filesystem around your Google Mail account, allowing you to use Gmail as a storage medium.
GMail Drive creates a virtual filesystem on top of your Google Gmail account and enables you to save and retrieve files stored on your Gmail account directly from inside Windows Explorer. GMail Drive literally adds a new drive to your computer under the My Computer folder, where you can create new folders, copy and drag’n'drop files to.
With GMail Drive you can easily copy files to your Google Mail Account and retrieve them again.
When you create a new file using GMail Drive, it generates an e-mail and posts it to your account. The e-mail appears in your normal Inbox folder, and the file is attached as an e-mail attachment. GMail Drive periodically checks your mail account (using the Gmail search function) to see if new files have arrived and to rebuild the directory structures. But basically GMail Drive acts as any other hard-drive installed on your computer.
You can copy files to and from the GMail Drive folder simply by using drag’n'drop like you’re used to with the normal Explorer folders.
Because the Gmail files will clutter up your Inbox folder, you may wish to create a filter in Gmail to automatically move the files (prefixed with the GMAILFS letters in the subject) to your archived mail folder.
Please note that GMail Drive is still an experimental tool. There’s still a number of limitations of the file-system (such as total filename size must be less than 65 characters). Since the tool hooks up with the free Gmail Service provided by Google, changes in the Gmail system may break the tool’s ability to function. I cannot guarantee that files stored in this manner will be accessible in the future.

Thursday, December 27, 2012

5 Computer Tips and Tricks commonly used


5 Computer Tips and Tricks .

Here are five popular tips from our current lessons that we think you will find helpful:
  1. When an application freezes on your computer, use the keyboard shortcut Ctrl+Alt+Delete. This shortcut opens the Task Manager where you can then select the unresponsive application and quit it.
  2. Triple-click your mouse to select a URL in your browser’s address bar. This makes it easy to copy and paste the URL. You can also triple-click a paragraph or double-click a word for faster selecting. 
  3. Need to find a word or phrase on a page with lots of text? Use the keyboard shortcutCtrl+F and a search box will appear on the page. You can then type the text you wish to find and it will become highlighted on the page. If it appears more then once, press Enter to move to the next instance. This tip is especially useful when trying to find something in a long list of data.
  4. Can’t find a file or application that you downloaded? Use the keyboard shortcut Ctrl+Dto open your Downloads folder.
  5. Use a password manager like LastPass to remember all your passwords. When you sign into this application (with your master password) it will automatically input usernames and passwords into the sign on pages for the accounts you use. It will even generate strong passwords when you sign up for new accounts.
If you like these tips, here are some that we plan on adding soon:
  • Make text larger on the screen to help with readability
  • How to conserve your device’s battery life
  • Capture something displayed on your computer by taking a screenshot
  • Email and share photos
  • Safely connect to public wi-fi

Wednesday, December 26, 2012

how to hack wireless network.....


Monday, December 24, 2012

Use registry shortcuts to disable and enable screensavers in Win XP:


The steps in this tip will show you how to edit the registry for a time-saving shortcut for enabling and disabling your screensaver.
When you perform maintenance operations such as defragmenting or backing up the hard disk, you probably disable your screensaver before you begin to prevent it from interfering with the maintenance operation. However, disabling your screensaver manually is a multistep operation that involves accessing the Display Properties dialog box, navigating to the Screen Saver tab, and setting the screen saver to None. Then, you need to re-enable the screen saver after you complete the maintenance operation.
Fortunately, you can automate the disabling and enabling screen saver procedures with a couple of registry shortcuts. Note: Editing the registry is risky, so make sure you have a verified backup before making any changes.
Here's how.

1. Launch Notepad and type the following four lines. (Note: The second line must be blank.)
Windows Registry Editor Version 5.00
[HKEY_CURRENT_USER\Control Panel\Desktop]
"ScreenSaveActive"="0"

2. Save the file to your desktop with the name Disable Screen Saver.reg.

3. Change the 0 to a 1 in the fourth line.

4. Save the file to your desktop with the name Enable Screen Saver.reg.

Now, when you need to disable the screen saver, just double-click the Disable Screen Saver.reg shortcut. To enable the screen saver, double-click the Enable Screen Saver.reg shortcut.
When you run either of these files, the Registry Editor will display two confirmation prompts—one before making the change and one after making the change.


How to Create a Password-Protected Disk on Your PC


You may want to encrypt that data to keep it from getting into the wrong hands.
When you encrypt data, you use a special algorithm to scramble the bits that make up that file into nonsensical information, which can be restored to its meaningful state only with the right password.
TrueCrypt is a free, open-source encryption application that works on Windows, Mac, and Linux. Given the right credentials, TrueCrypt creates a virtual  hard drive that reads and writes encrypted files on-the-fly. This hack explains how to encrypt your private files using TrueCrypt on Windows and Linux.

Set Up the Encrypted Volume Location
Here’s how to set up an encrypted virtual disk with
TrueCrypt:
1. Download TrueCrypt from http://truecrypt.org. Install and launch it.
2. Click the Create Volume button to launch a wizard that prepares the encrypted drive location. Choose Create an Encrypted File Container, click Next, and then select Standard TrueCrypt volume and again click Next.
3. On the Volume Location page, click the Select File button, navigate to the location where you want to store your encrypted files, and type a name for it such as C:\Users\adam\Documents\4myeyesonly, as  shown in Figure 2-15.
The name (4myeyesonly in this example) isn’t the file you want to encrypt; it’s the container that will store the files you encrypt. Click Next.
Figure 2-15: Create an encrypted volume with TrueCrypt.
4. Choose your encryption algorithm. The curious can flip through the drop-down list and view info on each option, but you can’t go wrong here; the default Advanced Encryption Standard (AES) selection works for most purposes. (Hey, if it works for Top Secret government files,3 it should work for you.) Click Next.
5. Choose the size of the virtual drive — for example, 100MB, as shown in Figure 2-16.
Figure 2-16: Set the size of your encrypted container.
The advantage here is that the file will always look as though it’s exactly 100MB, giving no hint as to the actual size of its contents. Click Next.
6. Choose your volume password. TrueCrypt wants something hard to crack, such as 20 characters with letters and numbers mixed together. The whole point here is to keep snoopers at bay, so make your password a non-dictionary word that’s difficult to guess. Alternatively, you can use a key-file to lock your volume.  warning Keep in mind that if you forget your password or your key-file gets corrupted or lost, the files on your TrueCrypt volume will be inaccessible — forever.
7. Format the volume. This part is fun: TrueCrypt gathers random information from your system — including the location of your mouse pointer — to format the file drive location with random data to make it impossible to read. Click the Format button to go ahead with this operation. (Don’t let the word format scare you; you’re not erasing your hard drive, you’re just formatting the drive location file — the 4myeyesonly file in this example — that you just created.)
When the formatting is complete, your encrypted volume location is ready for use.
Store and Retrieve Files from the Encrypted Volume Your TrueCrypt file can hold your highly sensitive files locked up as tight as a drum. Here’s how to get to it:

1. From TrueCrypt, choose Select File, and navigate to the volume file you just created.
2. Select an available drive letter such as X: from the list in TrueCrypt (see Figure 2-17). Figure 2-17:
To mount a TrueCrypt drive, select the file container and an available drive letter.
3. Click the Mount button and enter your volume password. If you enter the correct password, the virtual drive X: will be mounted.
4. Go to Computer. Listed alongside all the other drives on your computer is a new one: Local Disk X:. Drag and drop all your sensitive data to this drive and work from it as you would any other disk.
5. When you finish working with the data, in TrueCrypt, select the mounted drive (X: in this example) and click the Dismount button. The X: drive will no longer be available; all you have left is the 4myeyesonly file you created, which can be dropped onto a thumb drive, emailed to yourself, burned to CD, or placed on your iPod, totally encrypted.
If someone managed to open this file, its contents would be meaningless, indecipherable nonsense. Only a user with TrueCrypt installed and the password or key-file could mount the drive and access the files on it.
TIP Using TrueCrypt you can secure
an entire drive — such as a USB thumb drive. To do so, click Select Device instead of Select File, and choose your thumb drive. You can also install TrueCrypt to the thumb drive.