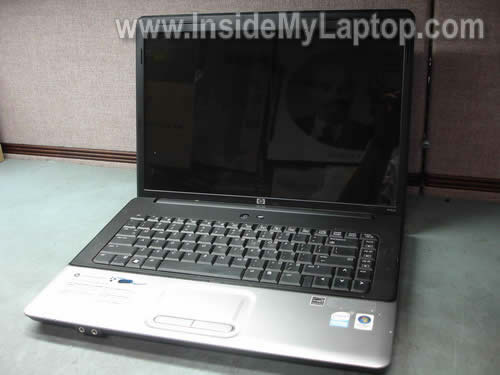
In the following guide I explain how to remove and replace damaged LCD screen in HP G50/G60/G70 notebooks. I’m installing a new LCD screen into a HP G50 notebook but all disassembly steps should be almost the same or at least very similar for HP G60 and G70.
By the way, HP G50/G60/G70 notebooks also known as Compaq Presario CQ50, Presario CQ60 and Presario CQ70.
In most notebooks you can replace the LCD screen without separating the display panel from the base but not in HP G50/G60/G70. In order to replace LCD screen in these models we’ll have to remove the keyboard, keyboard cover and display panel. Let’s start replacing the screen.
Need spare parts for your HP laptop? Search by the part name or number here. You can find the HP spare part number in the service manual. I linked to service manuals at the end of this guide.
In the next post I explain how to remove laptop motherboard.
STEP 1.
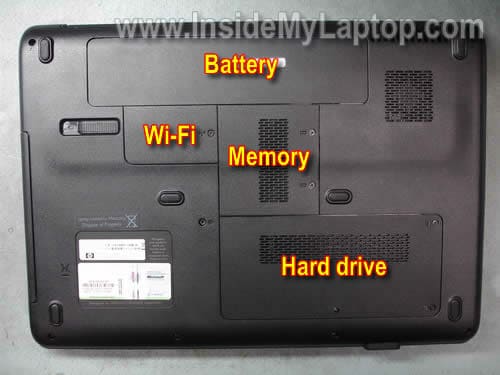
Turn off the laptop and remove the battery.
Remove one screw securing the Wi-Fi cover and remove the cover.
It is not necessary to remove the memory and hard drive covers. I marked them just for your convenience.
STEP 2.
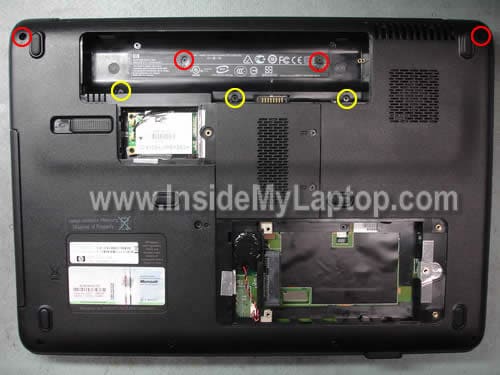
Remove three (yellow) screws securing the keyboard.
Remove four (red) screws securing the keyboard cover.
If you are using this guide for replacing the keyboard, you have to remove only three (yellow) screws.
In G50 and G60 the keyboard screws are located in the battery compartment.
In G70 notebooks there are only two screws securing the keyboard and they are located on the bottom (there is a small keyboard stamped close to each screw).
STEP 3.
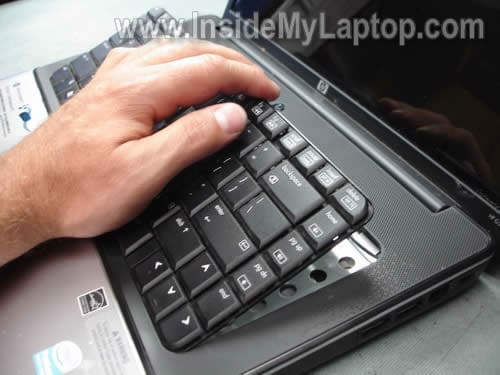
Carefully lift up the keyboard from the base.
STEP 4.
Place the keyboard so you can access the cable connector underneath.
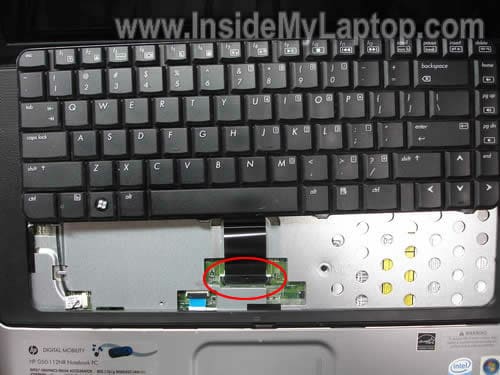
You have to unlock the connector and release the cable before removing the keyboard.
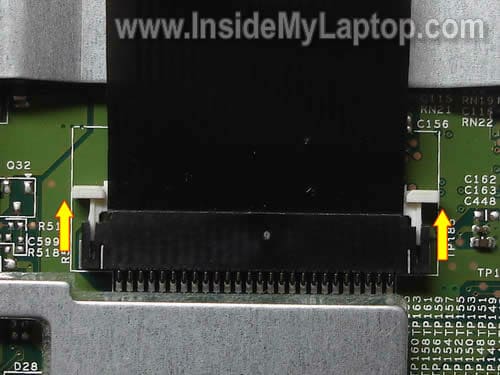
Move the white clip about 2-3 millimeters towards the display panel and release the cable. Now you can remove the keyboard.
WARNING! The white clip must stay attached to the connector base. If you accidentally break the connector, you’ll have to replace the motherboard. If you work slowly, everything should be fine.
On the picture below the keyboard connector is shown in the unlocked state.
STEP 5.
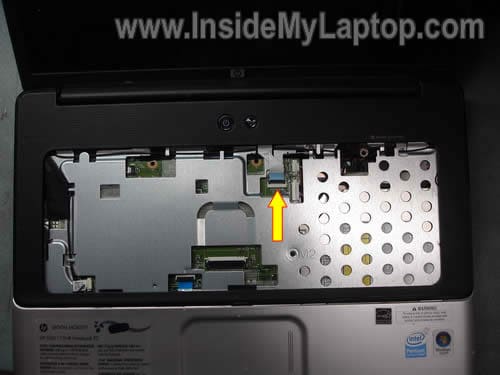
Disconnect the switch board cable from the motherboard.
STEP 6.
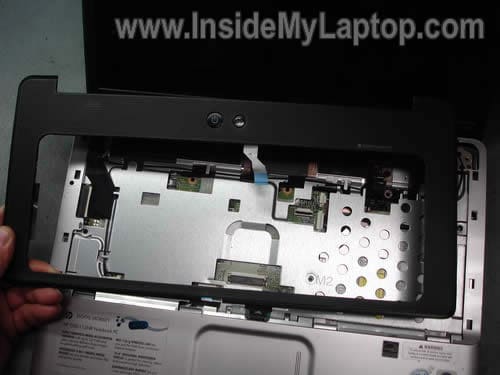
Remove the keyboard cover.
STEP 7.
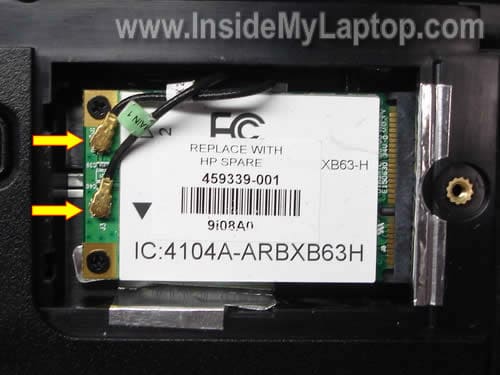
Turn the laptop upside down and disconnect two antenna cables from the wireless card.
Each antenna cable has a golden head. Grab the head with your fingers and lift it up.
STEP 8.
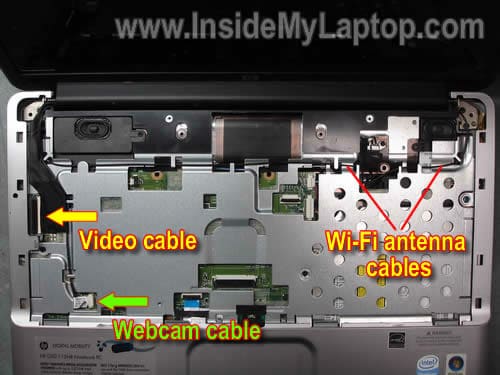
Disconnect the video cable connector from the motherboard.
Disconnect the webcam cable from the motherboard.
Pull two Wi-Fi antenna cables through the opening.
STEP 9.
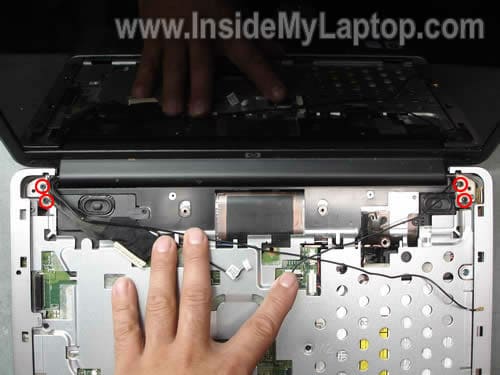
Remove four screws securing the display panel hinges.
STEP 10.
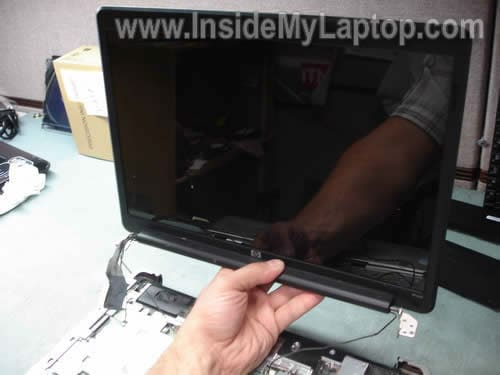
Lift up and separate the display panel from the laptop base.
In the following steps we will disassemble the display panel and remove the LCD screen.
STEP 11.
There are two screw seals located in the lower left and right corners.
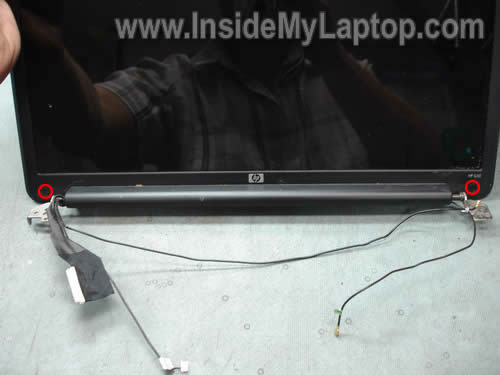
Remove these seals with a sharp object and remove screws found under the seals.
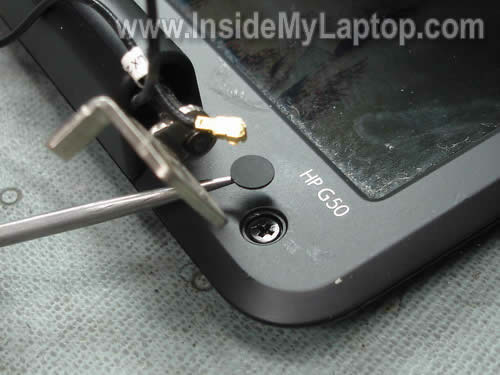
STEP 12.
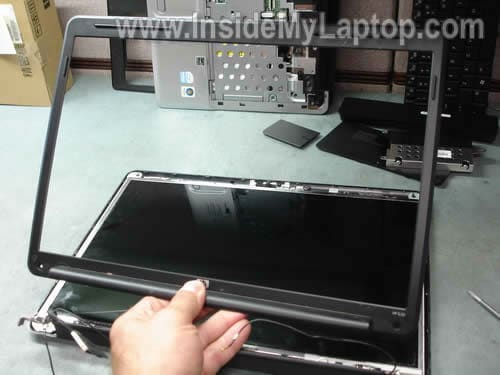
Start separating the screen bezel from the display cover.
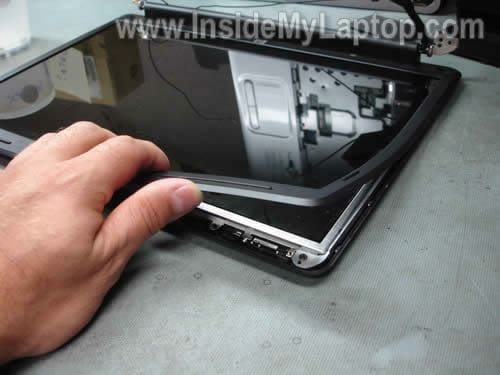
Continue separating the bezel.
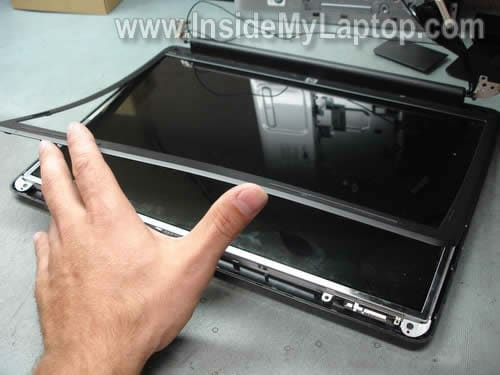
The screen bezel has been removed.
STEP 13.
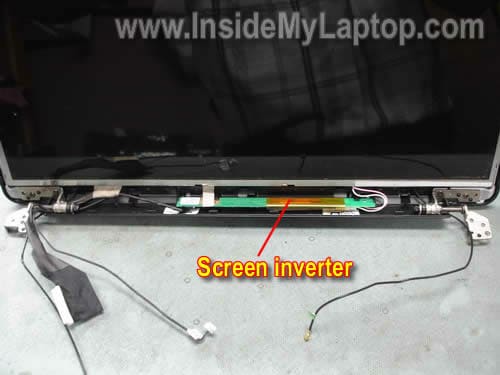
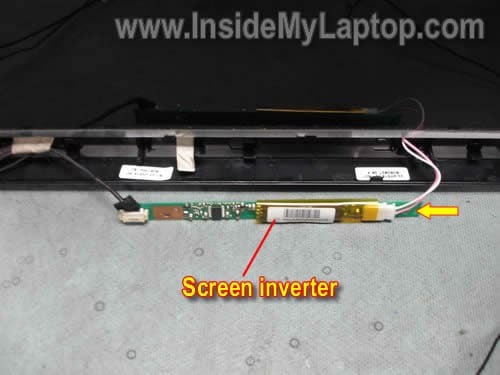
The screen inverter board is mounted below the screen. The inverter is locked between plastic brackets.
You can remove and replace the inverter board without removing the LCD screen. Simply pull the inverter board from the cover and disconnect connectors on both ends.
STEP 14.
Remove two screws securing the right display hinge.
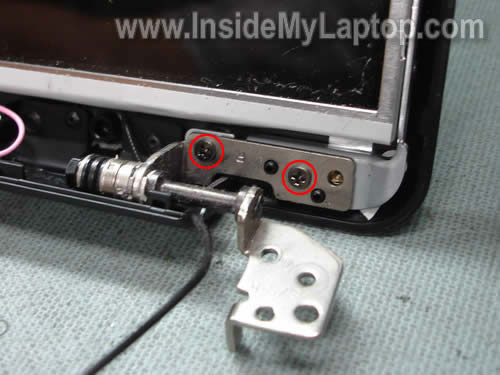
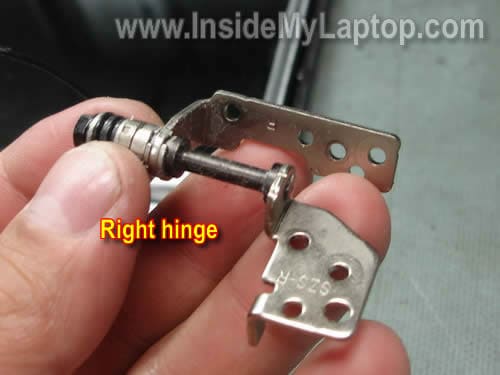
Remove the right hinge.
STEP 15.
Remove two screws securing the left display hinge.
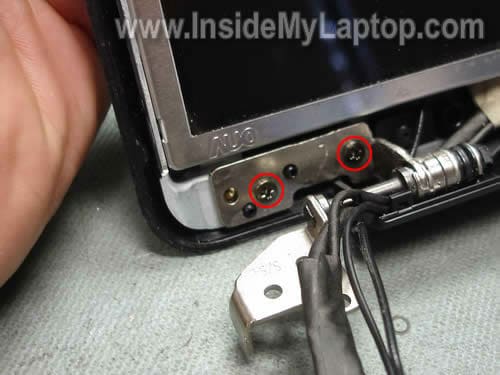
Remove the left hinge.
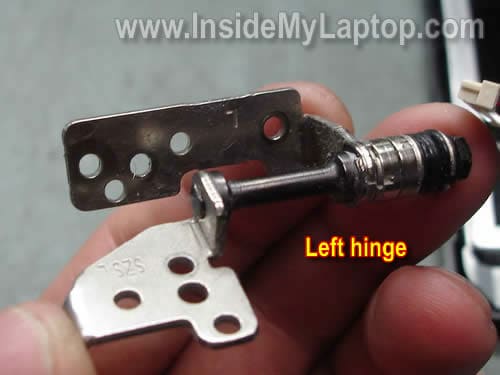
STEP 16.
Remove the inverter board from the cover and disconnect one connector from the right side. By the way, this is the backlight lamp connector.
STEP 17.
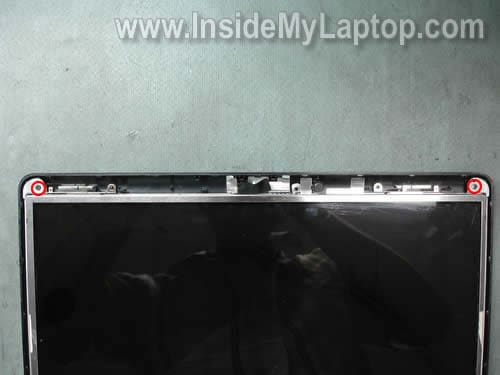
Remove two screws securing the LCD screen on the top.
STEP 18.
Now you can separate the LCD screen from the display cover and access the video cable.
My HP G50 notebook didn’t have the webcam installed and the webcam cable was taped to the display cover.
If you have a HP G60/G70 notebook, most likely it came with the webcam. You’ll have to disconnect the cable from the webcam before disconnecting the video cable.
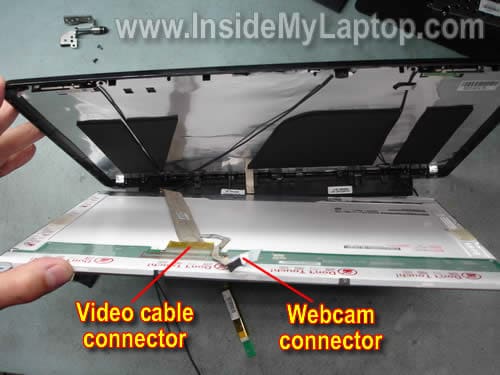
STEP 19.
Remove sticky tape securing the video cable connector and unplug cable from the LCD screen.
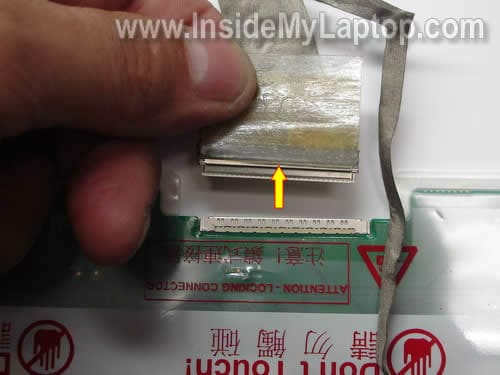
STEP 20.
Now you can remove the LCD screen from the cover.
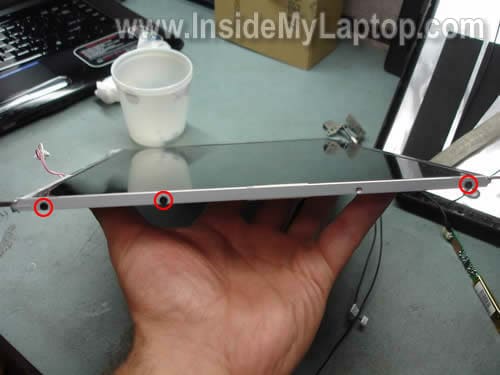
If you are replacing the screen, you’ll have to transfer the left and right mounting brackets to the new screen.
Remove three screws securing the bracket and remove the bracket. Do the same with the other side.
The LCD screen model number is located on the sticker. In my laptop I had a screen with the following model number: B154EW08 v.1
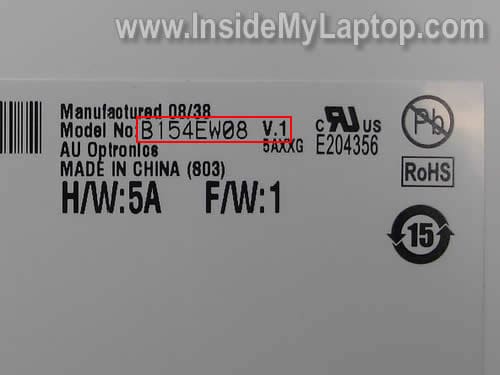
The best way to find a new LCD screen for your laptop is either searching by the LCD model number (shown in the picture above) or using the HP part number.
The HP part numbers for LCD screen and other parts can be found in service manuals and here they are.


0 comments:
Post a Comment